Overview:
The 'Explore Screen' ad format is positioned within the 'Explore' tab of the Viber application. The tab serves as a dedicated space where users actively seek out brands, content, and engaging experiences.
Technical Specifications:
• Image/video (min 5 sec, max 15 sec):
- Dimensions for Android of 300x250 pixels
- Dimensions for iOS of 200x200 pixels
- Supported file types: .jpg, .png, Hosted file, Vast Tags, MP4
• Title: maximum 60 characters
• Description: maximum 119 characters
• Call-to-Action (CTA): maximum 15 characters
• Sponsored: maximum 25 characters (only for Android needed)
• Icon:
- dimensions for Android of 60x60
- dimensions for iOS of 50x50
Google Deal Technical Specifications:
- Image dimensions: 1200x627 pixels and 600x600 pixels
- Title: recommended up to 20 characters, maximum 60 characters
- Description: recommended up to 25 characters, maximum 119 characters
- Call-to-Action (CTA): recommended up to 10 characters, maximum 15 characters
- Sponsored: maximum 25 characters
- Icon dimensions: 100x100 pixels
Creative Setup Steps:
1. Add Creative: Add the creative through the 'Profile' blade or separately through the 'Creatives' blade.
2. Select an Advertiser: In case of adding the creative from the 'Creatives' blade select an advertiser from the available list.
3. Name: Provide a distinctive name for the creative.
4. Template Selection: Choose the Native Universal template to structure your creative.
5. Main Information:
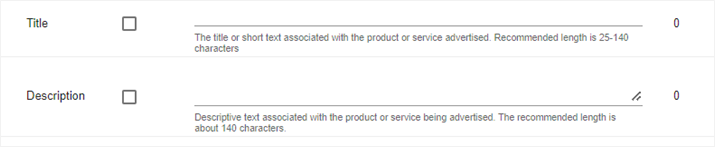
a. Title: Enter a concise title containing up to 60 characters. This title represents the core message associated with the advertised product or service.
b. Description: Enter a descriptive text within a limit of 119 characters. This description complements the product or service being promoted.
c. Main Image Upload: Upload the primary image, adhering to the specified dimensions.
6. Additional Information:
a. Call-to-Action (CTA) Text: Define the text for the Call-to-Action button. This text encourages users to take the desired action upon clicking.

7. Branding Section: Add the advertiser's domain in the 'Branding' section.
8. Landing Page Section: Specify the landing page URL where users will be redirected after clicking the creative. The default landing page type should remain unchanged.
9. Event Tracking: If needed, select the event type and add the event code in the Event Tracking section to enable tracking through third-party tools.

These instructions ensure a comprehensive and proper setup for your creative within the Viber application, catering to the specific requirements of each operating system.