Add and Configure DSP
The DSPs tab offers a comprehensive overview of all added Demand-Side Platforms (DSPs) within the platform. It provides essential statistics on Bid Performance and Impression Rate for each listed DSP. Users can utilize the Search option to quickly find specific DSPs and filter them based on assigned AdOps managers.
The tab feature separate sections for Active & Paused DSPs and Removed DSPs, allowing for easy management.
Each DSP entry in the list includes quick buttons for editing, activating/pausing, and removing DSPs. To access a DSP's profiles, simply click on the desired DSP in the list.
Add a DSP
On the DSPs tab click the 'New DSP' button in the upper right corner. On the opened modal window fill in the Main Settings first, then proceed to Targeting, Demand Rules and Access to Statistics. 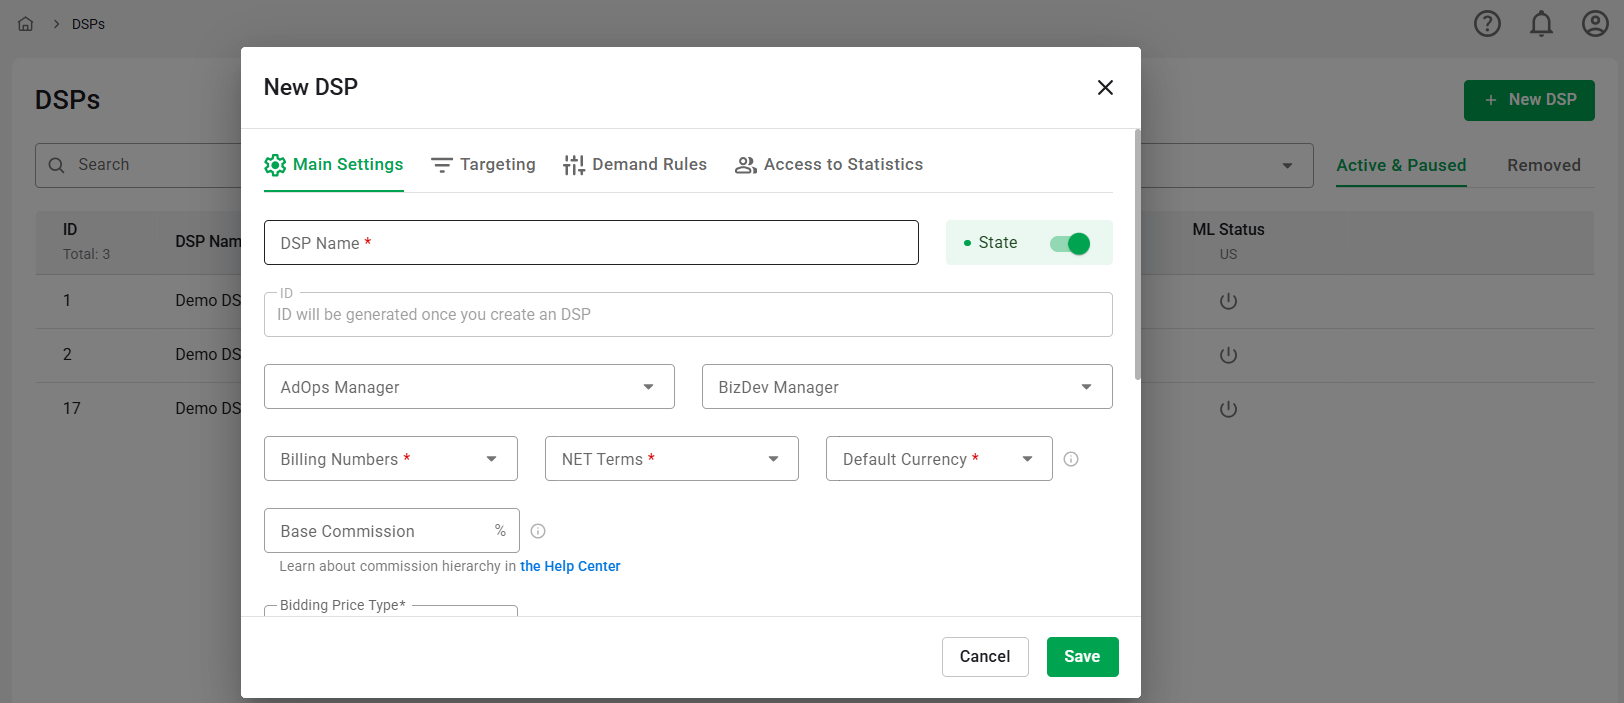
Main Settings
- Enter a DSP Name (required).
- ID (inactive on creating a DSP tab): Upon creating a DSP, an ID will be automatically generated. This ID is used internally within the platform for tracking and management purposes.
- Choose the AdOps Manager from the dropdown list. The list displays all users who hold the position of AdOps Manager. You will be able to filter statistics by the AdOps manager in the report.
- Choose the BizDev Manager from the dropdown list. The list shows all users who hold the position of BizDev Manager. You will be able to filter statistics by the BizDev manager in the report.
- Billing Numbers (required): Choose the entity responsible for billing data. Options include: [Your Account Name] (your organization), Partner.
- NET Terms (required): Select the payment terms from the dropdown options: 15, 30, 45, 60, or 90 days. This specifies the timeframe within which payment is due after an invoice is issued.
- Default Currency (required): Choose the default currency for the DSP. This currency will be used for bid floor conversion and displaying statistics within the API.
- Base Commission: Enter the minimum guaranteed commission to be included in the Bidfloor parameter. The final profit may be higher in a 2nd-price auction. For more details, refer to the commissions hierarchy article.
- Bidding Price Type1: Choose how the outgoing bid floor is calculated between NET and Gross options:
- NET: When selected, only the applicable commission is added to the final bid floor in the outgoing request (see commissions hierarchy article).
- Gross: When selected, both the applicable commission and the Gross Offset Percent (allowed range: 1 % – 99 %) are added to the final bid floor in the outgoing request. If the impression is won, the corresponding Gross Offset amount will be recorded under the Gross Offset metric in DSP and Finance performance reports.
- Integration Adapter: The RTB Integration Adapter dropdown allows you to choose from various adapters, each tailored to handle the specific requirements and protocols of different DSPs. The default option, Standard, adheres to the standard OpenRTB protocol version 2.6. Integration Adapters are specialized components that enable the RTB-Stack Platform to effectively communicate with different DSPs by translating the standard format into the specific format required by each DSP. These adapters can override certain values in the ad request sent to the DSP, ensuring that the request is correctly formatted and meets the DSP's expectations. Some of the values that can be overridden by the Integration Adapters include:
- Bid Floor Truncation: Some DSPs have specific requirements regarding the number of decimal places included in the bid floor value. To accommodate these requirements, the platform automatically truncates the bid floor value to the necessary precision as dictated by each DSP.
- App ID/Site ID Substitution: Depending on the DSP's requirements, you can substitute the default App ID or Site ID with a custom value specific to your integration. These values can be added in the corresponding Profile settings under each DSP.🛈
- Tag ID Substitution: Depending on the DSP's requirements, you can provide a custom Tag ID value for certain DSPs that require it. This value can be added in the corresponding Profile settings under each DSP.🛈
- Spend Limit: Set a Spend Limit to control your budget by setting a maximum limit on the amount spent on a DSP and/or its profiles. The limits work on an ASAP basis, meaning that they are enforced as soon as the specified conditions are met, rather than being spread over the entire indicated date range. If different limits are set on a DSP and its profile, the entity whose limit is reached first will stop. The status of the entity will then change to 'Reached Limit'. This status will automatically change back to 'Active' after the period of the limit has passed. The fields for setting these limits include:
- Limit Amount: This is an input field that accepts only integers greater than 0. If a Limit Amount is set, the selection of a Metric for Limit and a Limit Type becomes mandatory.
- Metric for Limit: Choose the metric that will be monitored. Options include Billed Impressions or Revenue (USD).
- Limit Type: Determine the period for the limit. Options include Daily, Monthly, or Total.
- Choose the Format for sending Country code in ISO-3166-1
- Alpha-3: This format represents country codes using three alphabetical characters (e.g., USA for the United States).
- Alpha-2: This format represents country codes using two alphabetical characters (e.g., US for the United States).
- Hide Supply Chain Info: This toggle allows you to control whether supply chain details are disclosed to the DSP.
- Ad size augmentation: Toggle on to enable automatic addition of related ad sizes to outgoing requests (RTB only). Read more about this feature here.
- Click the Save button or proceed to Targeting.
Targeting
Targeting allows you to refine the traffic that will be sent to the DSP. It uses various logical operations, including boolean functions and the use of blacklists or whitelists. With the latter, you have the option to upload a pre-prepared file for use across the platform.
Pre-targeting inventory helps you avoid sending non-performing requests to your DSP partner, thereby optimizing server capacity for high-performing inventory. This often results in higher bid rates and CPMs.
For a detailed breakdown of each targeting method and its logic, please refer to this page.
Demand Rules
In situations where specific demand should be rejected upon receipt from the DSP, it's necessary to set up demand rules. These rules use various logical operations, including boolean functions and the use of blacklists or whitelists. With the latter, you can upload a pre-prepared file for use across the platform.
For a detailed explanation of each rule and its logic, please refer to this page.
1 Gross Offset Mechanism: To counter DSPs’ Gross-bidding markups, the platform applies an additional Gross Offset fee reflecting the Gross-to-Net difference. This offset is recorded as a separate metric in our database and carried through every stage of the bid lifecycle for accurate tracking and reporting.