Creating a New Deal
The process of creating a Deal is designed to be both efficient and user-friendly. It consists of two main steps:
1. Creating PMP (Private Marketplace) object.
2. Creating Deal object.
Step 1. Creating a New PMP
A Private Marketplace (PMP) is an exclusive marketplace where premium publishers invite specific advertisers to bid on their high-quality inventory. PMPs are essentially containers for Deals, providing a controlled environment for executing pre-negotiated agreements between buyers and sellers. This paragraph will guide you through the process of creating a PMP, explaining each field in detail.
PMPs Table:
The main table for PMPs includes the following columns:
- PMP Name: This is the unique name you assign to your PMP. It helps in identifying and managing different PMPs.
- DSP (Demand-Side Platform): This column indicates the DSP that is participating in the PMP.
- Private Auction: A checkmark in this column signifies that the PMP is set up as a private auction. A minus mark indicates that it is not a private auction.
- Deal Quantity: This column shows the number of deals associated with the PMP.
To create a new PMP, click on the "New PMP" button located in the upper right corner of the screen. This will open the "New PMP" modal window with the following fields: 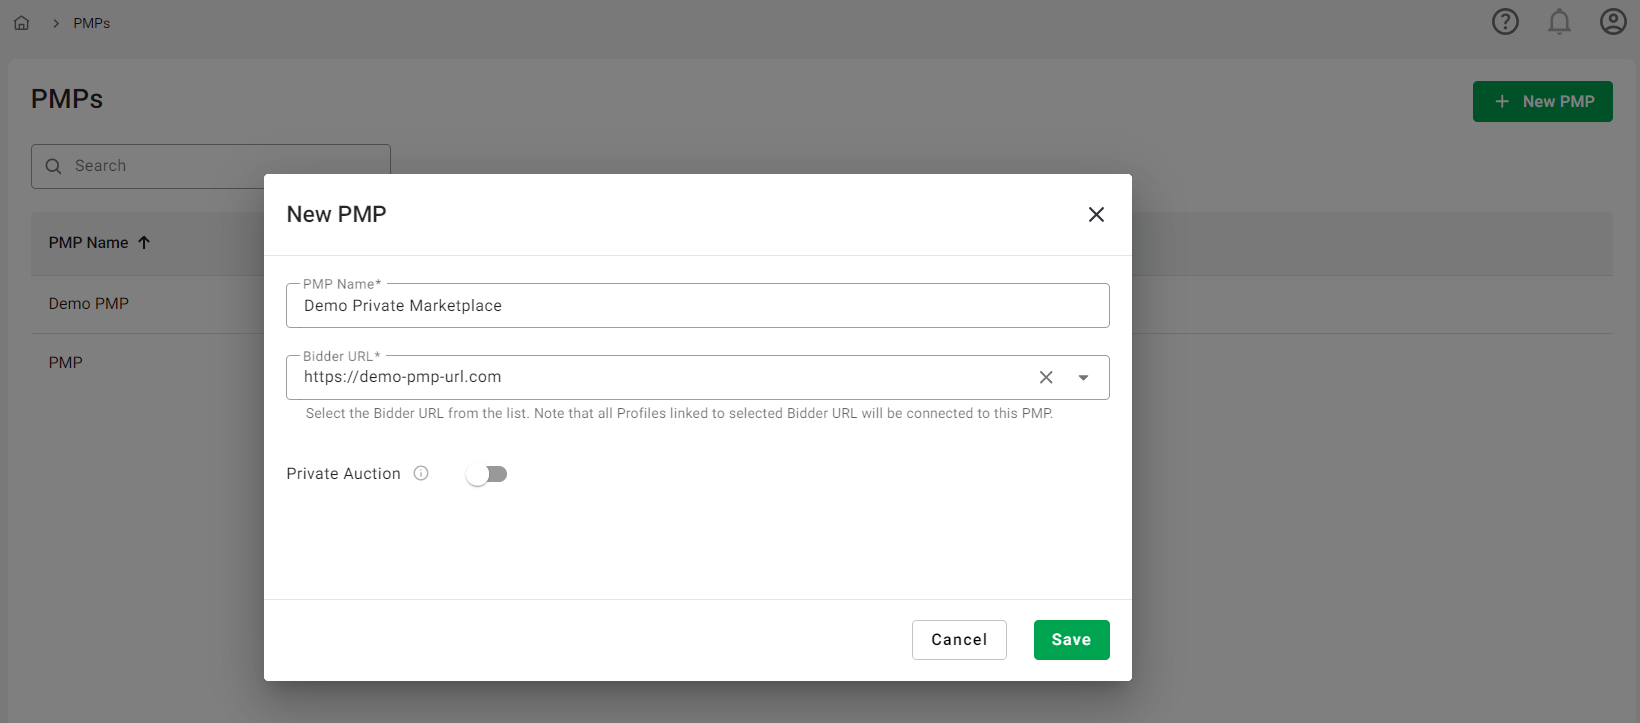
- PMP Name (required): Enter a unique name for your PMP. This name will be used to identify your PMP in the system.
- Bidder URL (required): Select the Bidder URL from the dropdown list. Note that all Profiles linked to the selected Bidder URL will be automatically connected to this PMP. Each Bidder URL can only be attached to one PMP. If a Bidder URL is already attached to a PMP, it will appear as disabled in the dropdown list.
- Private Auction (toggle): If the toggle is switched on, the auction is set as private, meaning bids are restricted to the deals specified and their respective terms. If the toggle is off, all bids are accepted.
Once you have filled in all the required fields, click on the "Save" button to create your PMP. You can then start adding Deals to your newly created PMP.
Step 2. Creating a New Deal
A Deal is a pre-negotiated agreement between a buyer (DSP) and a seller (SSP) that sets the terms for the purchase of ad inventory. Deals can specify various parameters, such as the price (Bid Floor), the specific inventory to be purchased, and the parties (White Seats) allowed to participate in the deal. This paragraph will guide you through the process of creating a Deal.
Deals Table
The Deals table provides an overview of all your deals. It includes the following columns:
- Deal ID: This column shows the unique identifier for each deal.
- Guaranteed Deal: This column indicates if the deal is guaranteed, displaying a check mark icon for guaranteed deals and a cross icon for non-guaranteed deals.
- Bid Floor: This column shows the minimum bid value for each deal. If the Custom Bid Floor value is left empty, a dash will be shown in this column.
- White Seats: This column lists the seats that are allowed to bid on each deal. The seats are displayed as comma-separated values.
- State: This column indicates the current status of each deal. The possible states are 'active', 'paused' and 'reached limit'.
At the top of the Deals tab, you'll find a Search option that allows you to quickly locate specific deals. Next to each deal in the table, there are buttons for quick editing, activating/pausing, and deleting the deal.
Creating a new Deal is a straightforward process. Follow the steps below:
-
Select a PMP from the list.
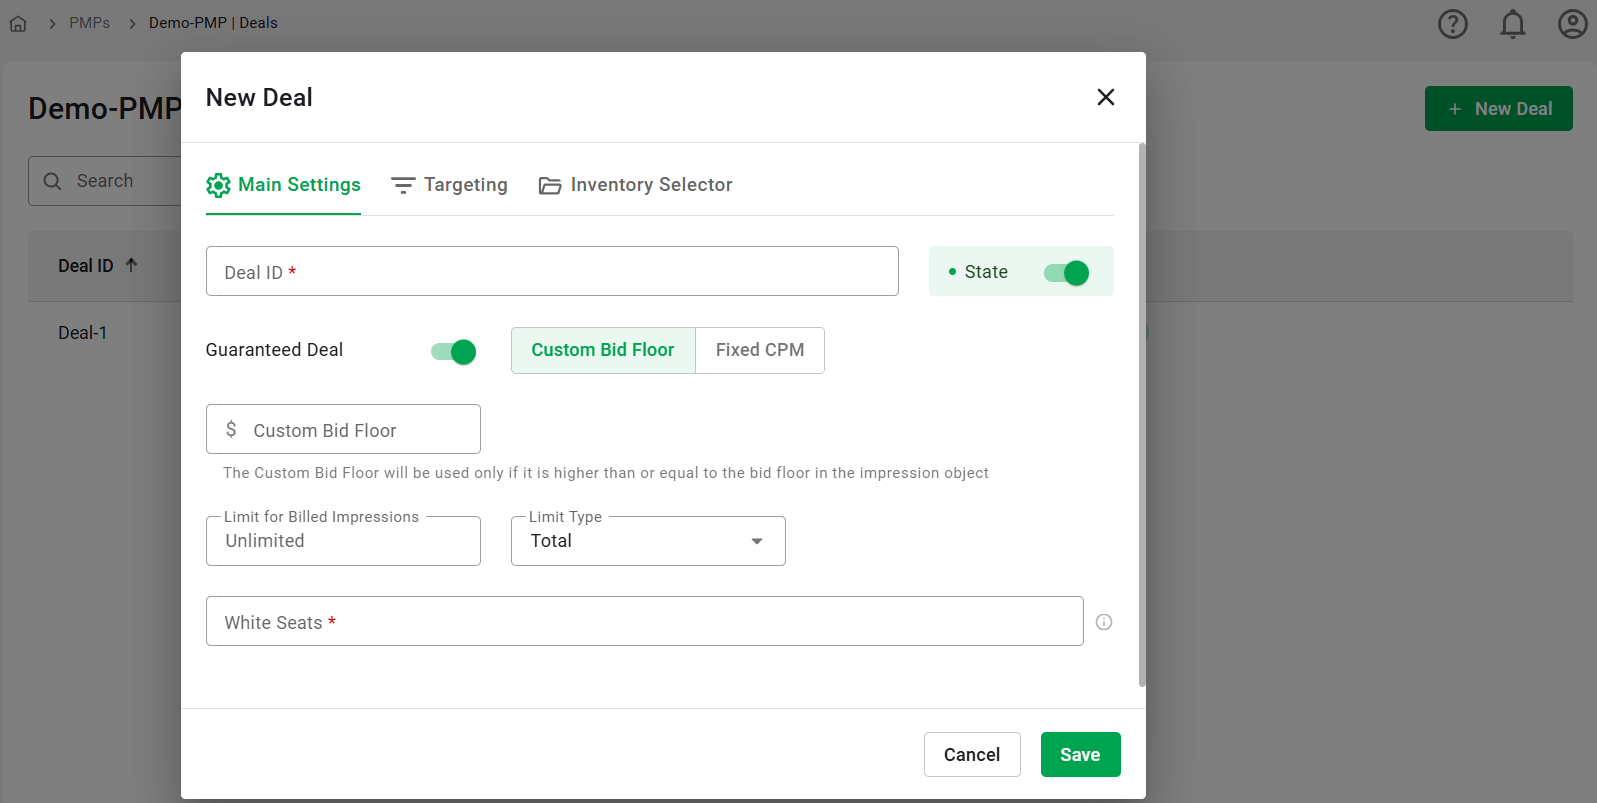
Click on the "New Deal" button located in the upper right corner. A modal window will appear with several tabs.
-
Start with the Main Settings tab. Here, you need to fill in the following fields:
- Deal ID (required): Enter a unique identifier for the deal. The maximum number of characters allowed for the Deal ID is 70.
- Guaranteed (toggle): Enable this switch if the deal requires guaranteed delivery. Additional configuration fields will appear when this toggle is active.
- When Guaranteed is OFF:
- Custom Bid Floor, $: Enter the minimum bid value for the deal. The Custom Bid Floor will be used only if it is higher than or equal to the bid floor in the impression object (
BidRequest.imp.bidfloor).
- Custom Bid Floor, $: Enter the minimum bid value for the deal. The Custom Bid Floor will be used only if it is higher than or equal to the bid floor in the impression object (
- When Guaranteed is ON:
- Switcher: Choose between Fixed CPM and Custom Bid Floor.
- Fixed CPM: Enter a fixed price value between $0 and $100, with up to two decimal places. The deal will only proceed if the Fixed Price is greater than or equal to the bid floor in the impression object (
BidRequest.imp.bidfloor) + Commission. For the Bid Response, the system will calculate the DSP price based on the Fixed Price, ignoring the Bid Price received from the DSP. - Custom Bid Floor, $: Enter the minimum bid value for the deal. The Custom Bid Floor will be used only if it is higher than or equal to the bid floor in the impression object (
BidRequest.imp.bidfloor).
- Fixed CPM: Enter a fixed price value between $0 and $100, with up to two decimal places. The deal will only proceed if the Fixed Price is greater than or equal to the bid floor in the impression object (
- Limit for Billed Impressions: Input the number of impressions allowed. If no limit is set, it will default to "Unlimited".
- Limit Type: Choose from the dropdown options of Total, Daily or Monthly.
- Switcher: Choose between Fixed CPM and Custom Bid Floor.
- When Guaranteed is OFF:
- White Seats: Enter a list of comma-separated buyer seats (e.g., advertisers, agencies) allowed to bid on this deal. IDs of seats should be coordinated between bidders and the exchange a priori. Note that White Seats become required when Guaranteed is ON.
-
After filling in the Main settings, you can either click "Save" or proceed to the Targeting tab. Targeting allows you to refine the traffic that will be sent to the specific Deal. It operates by evaluating incoming bid requests. If the Impression Opportunity passes the Profile targeting and matches the Deal targeting, the exchange will include this deal in the outgoing request (along with all other matched deals). Targeting employs various logical operations, including boolean functions and the use of blacklists or whitelists. With the latter, you have the option to upload a pre-prepared file for use across the platform. Pre-targeting inventory helps you avoid sending non-performing requests to your DSP partner, thereby optimizing server capacity for high-performing inventory. This often results in higher bid rates and CPMs. For a detailed breakdown of each targeting method and its logic, refer to this guide.
-
The last tab is the Inventory Selector. Here, you can choose one or more packages to link inventory. Each package includes several endpoints organized by SSPs. You can select an entire SSP with its endpoints or individual endpoints. Use the blacklist or whitelist options to exclude specific SSPs/endpoints or include only the selected ones.
Remember to click "Save" once you've completed all the necessary fields and settings. Your new Deal is now created and ready for use.